ADL2012-R80M-T01 is specified as 800 nH ±20% at 1 MHz with a typical rated current of 1.8 A — a combination that defines its role in automotive decoupling and PoC designs. This deep dive gives engineers a focused, data-driven view of the ADL2012-R80M-T01 TDK inductor: what the datasheet numbers mean in real boards, how the part behaves under DC bias and transient loads, and practical measurement and layout steps to validate performance on a target PCB. The goal is actionable guidance for engineers evaluating this 0805-format wound ferrite SMD inductor for in-vehicle camera feeds, PoC rails, and decoupling where board space, reliability, and predictable behavior under bias are critical.
1 — Product Background: ADL2012-R80M-T01 in the ADL family
ADL2012 family overview
The ADL2012 family is positioned as wound ferrite SMD power inductors optimized for decoupling in automotive and industrial systems where AEC‑Q200 qualification and compact footprint are requirements. Designed with a wound ferrite core and solderable terminations, these 0805 (2012 metric) parts balance inductance per volume against acceptable DC resistance and rated current for typical subsystem rails. In practice, ADL devices are selected when designers need higher inductance values than typical multilayer chip inductors can provide in the same footprint without switching to larger parts. The AEC‑Q200 relevance signals that the manufacturing, material selection and process controls meet automotive supplier expectations for thermal and mechanical reliability, making the family suitable for camera modules, ADAS sensor electronics and other constrained automotive subsystems.
Target applications (automotive PoC, decoupling)
The ADL2012-R80M-T01 targets decoupling and power‑over‑coax (PoC) feed applications where an 800 nH choke suppresses conducted noise and helps isolate supply disturbances on camera or sensor power lines. Typical system voltages for these applications range from 5 V to 12 V in PoC camera rails, with transient currents and inrush events that can approach several amperes locally; the part’s ~1.8 A typical rated current identifies the practical bias region before inductance reduction becomes noticeable. Designers choose this value when they need impedance in the low‑to‑mid MHz band to complement bulk and high‑frequency capacitors, and where the compact 0805 footprint must fit tight board real estate inside camera housings or harness connectors without sacrificing automotive reliability.
Manufacturing & quality qualifications
TDK’s ADL2012 family is offered with AEC‑Q200 screening and is specified across automotive operating temperatures (commonly −40 °C to +125 °C or higher depending on variant). For procurement, this means traceability, lot testing and process controls consistent with automotive programs; purchasers should confirm specific lot traceability and certificate of conformity for production runs. The AEC‑Q200 designation also implies mechanical robustness to shock and vibration, and thermal endurance through the relevant temperature cycles. For safety‑critical systems, confirm the supplier’s packaging (reel, quantity per reel) and documented change‑control process to avoid mid‑program surprises.
2 — Specs Snapshot: key electrical & mechanical specs for ADL2012-R80M-T01
Electrical baseline: inductance, tolerance, frequency reference
Specified at 800 nH ±20% measured at 1 MHz, the ADL2012-R80M-T01’s inductance figure is frequency‑referenced; inductance measured at other frequencies can differ due to core permeability dispersion and winding parasitics. When reading the ADL2012-R80M-T01 specs, note that the datasheet’s 1 MHz point is a reference for consistency across parts — actual impedance vs frequency is more relevant for decoupling decisions. For SEO- and searchability-conscious documentation, common long‑tail descriptors engineers use are “ADL2012-R80M-T01 specs”, “TDK inductor 800 nH” or “ADL2012-R80M-T01 datasheet specs”. Use those phrases in procurement and BOM notes to speed matching when searching distributor catalogs.
Current & resistance specs (Isat, I_rated, DCR)
The datasheet lists a typical rated current around 1.8 A where inductance drops by a defined percentage (commonly the L‑change specification, e.g., 30% reduction). Saturation current (Isat) is higher than the rated L‑change point and corresponds to where inductance collapses rapidly; designers must compare both the “rated current (L change)” and the separate “rated current (temperature rise)” specifications, since the latter indicates allowable DC for a defined temperature rise due to I²R losses. DCR (DC resistance) is typically on the order of ~120 mΩ for this family and footprint; DCR tolerances and maximums appear on the datasheet. For thermal budgeting and efficiency, use the worst‑case DCR value from the datasheet when calculating conduction losses at expected operating currents.
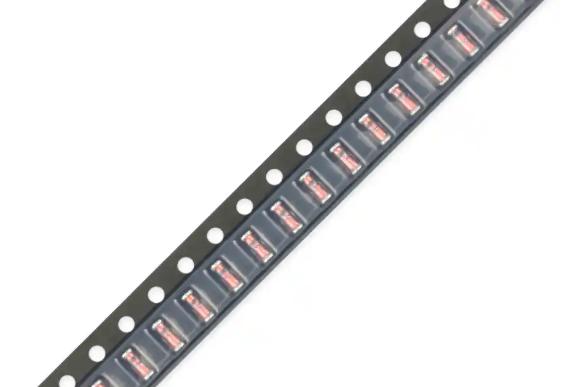
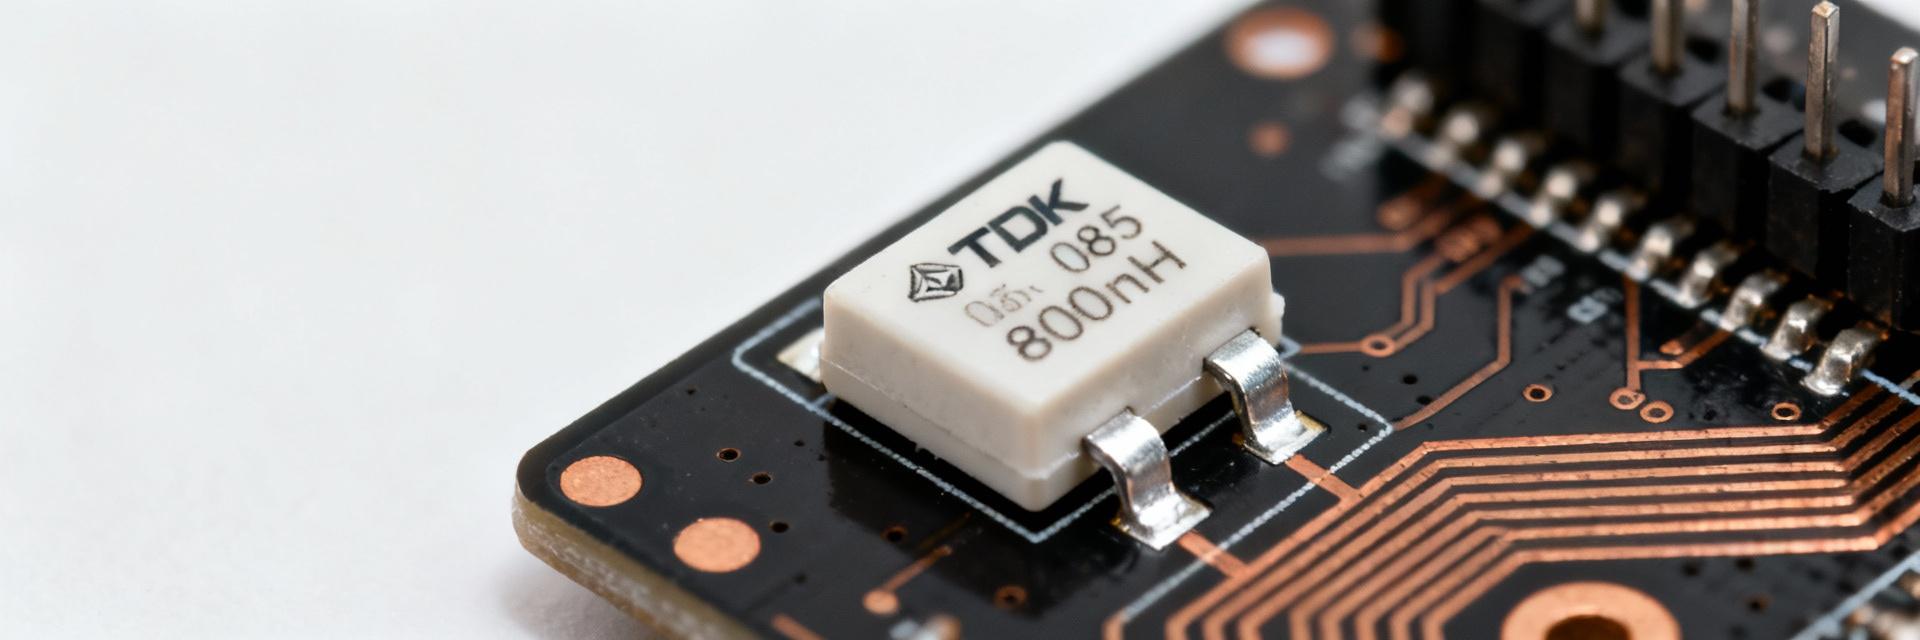
Mechanical & environmental specs
Mechanically, the ADL2012-R80M-T01 uses an 0805 footprint (2.0 × 1.25 mm nominal) with a maximum height consistent with ADL2012 family limits; check the datasheet drawing for exact maximum profile to ensure enclosure fit. Environmental ratings include the automotive operating temperature range and typical solder reflow process compatibility; shielding is dependent on construction — wound ferrite parts may provide partial self‑shielding but are not necessarily fully shielded like metal‑cased chokes. Confirm moisture sensitivity level (MSL), recommended soldering profile and any special handling notes if reflow in dense camera modules or connector assemblies is required.
3 — Performance analysis: what the specs mean in real circuits
Impedance vs frequency & decoupling effectiveness
At 800 nH nominal, the inductor’s impedance rises with frequency up to a resonance point driven by winding capacitance; typical impedance curves show a mid‑frequency peak and then decline past self‑resonance. For decoupling, this inductance provides high impedance in the low‑to‑mid MHz band where switching noise and PoC feed disturbances often concentrate. Choosing 800 nH favors attenuation of midband noise while allowing lower‑frequency bulk capacitors to handle low‑frequency transients; if you need suppression at higher RF frequencies, pair the inductor with lower‑ESR, high‑frequency bypass capacitors. Read manufacturer impedance plots to identify the band where the inductor contributes most — if that band overlaps the system’s dominant noise, the ADL2012‑R80M‑T01 is a good fit.
Current handling, saturation, and transient response
Under DC bias and pulsed loads, effective inductance reduces; the rated current (1.8 A typical for L change) gives a practical limit before voltage droop and reduced impedance impact performance. For transient events, the inductance and series resistance determine how quickly the choke allows current to change and how much voltage appears across it. If the application experiences fast current spikes or repetitive pulses, evaluate L vs I curves from the supplier and measure on a realistic pulse profile — some designers derate the part by 20–30% from datasheet rated current to maintain margin against saturation during repeated transients and elevated temperature conditions.
Losses: DCR, heat, and efficiency trade-offs
DCR directly converts conductor current into heat: P_loss = I² × DCR. At 1 A through a 120 mΩ DCR inductor, power loss is 120 mW; at 2 A that rises to 480 mW and can produce measurable temperature rise in a confined camera housing. For efficiency‑sensitive rails, a lower DCR alternate may be preferable even if it costs board area or money. Thermal coupling to the PCB and nearby copper pours mitigates hotspot buildup, so combine DCR calculations with thermal simulation or measurement to ensure the part’s temperature remains within its rated limits under worst‑case duty cycles.
4 — Measurement & validation: test methods for ADL2012-R80M-T01 specs
Recommended test setup and instruments
Measure inductance and impedance with an LCR meter or impedance analyzer capable of the datasheet reference frequency (1 MHz) and with a bias current source to reproduce L vs I characteristics. Use a four‑terminal test fixture or Kelvin‑type clip to minimize lead and fixture impedance; where possible, measure on a PCB test coupon with the part soldered using production solder profile to capture real mounting effects. For thermal characterization, a thermal chamber and thermocouples attached to the part or nearby copper works well; to reproduce in‑vehicle conditions, combine temperature cycling with bias current and pulsed loads.
Interpreting manufacturer curves and performing sample testing
Compare lab plots of L vs I, impedance vs frequency and DCR vs temperature to the manufacturer curves: small systematic offsets are common, but trends should match. Define pass/fail thresholds for qualification: typical criteria include L at bias within datasheet tolerance at the referenced frequency, DCR within max limit, and Isat behavior matching the L‑vs‑I curve within an agreed delta (for example, ±10% of the datasheet curve). For production sign‑off, sample multiple reels across process lots and validate on the target PCB rather than a free part fixture to account for board parasitics.
Common measurement pitfalls and how to avoid them
PCB traces, probe leads and fixtures add inductance and resistance that skew low‑value and high‑frequency measurements. Avoid single‑ended probe connections and long jumper wires; use short Kelvin leads or four‑terminal fixtures and subtract fixture contributions if possible. For impedance analyzers, ensure the test signal amplitude is in the small‑signal region unless intentionally measuring non‑linear bias responses. Finally, be mindful of self‑heating during long measurements — allow cooldown or use pulsed tests to avoid DCR drift that masks true part performance.
5 — Application examples & layout guidance
Example 1: Power-over-coax (PoC) decoupling in automotive camera systems
In PoC feeds to automotive cameras, ADL2012‑R80M‑T01 can sit in the positive feed between the harness connector and the camera power entry, forming a series choke that, with upstream/discerned capacitors, isolates cable‑borne noise from the camera’s internal regulator. Place the inductor as close to the camera power input as possible to block noise from entering sensitive downstream circuits; pair with a bulk electrolytic for low‑frequency energy and a ceramic X7R stack (e.g., 1 µF–10 µF) for mid/high‑frequency bypass. Expect improved image stability by suppressing conducted disturbances and improved CIS immunity to harness transients when layout and decoupling are tuned to the system’s noise spectrum.
Example 2: DC‑DC converter input/output decoupling
For buck converter input filtering, place the ADL2012‑R80M‑T01 between the input source and VIN pin with the input capacitor immediately adjacent to the VIN‑PGND pin pair to maintain a low impedance loop. On the output side, the choke can form part of an LC filter to shape transient response; when paralleling capacitors, combine larger electrolytic or polymer caps for bulk with low‑ESR ceramics to cover high‑frequency content. Monitor converter control loop stability if the inductor is used on the output — added series inductance can interact with output impedance and require compensation tuning or different capacitor ESR profiles.
PCB layout and thermal/mechanical placement tips
Layout do’s: keep the inductor close to the source or load pin it serves, minimize loop area by placing decoupling capacitors adjacent to the inductor terminals, and use thick short traces or copper pours to lower DCR‑related heating. Don’ts: avoid routing high‑speed signals directly adjacent to the choke if they could magnetically couple, don’t place large thermal masses that prevent convective cooling if the part runs hot, and avoid placing the part under heavy components that impair reflow. For reflow, follow the supplier’s recommended solder profile and handle parts to avoid tombstoning or solder fatigue that can arise in tight camera modules.
6 — Selection, procurement & spec acceptance checklist
Choosing between ADL variants and alternatives
Selecting among ADL family variants or competing parts comes down to the tradeoffs of inductance, DCR, Isat and shielding. If efficiency is a priority, search for lower DCR or larger footprint options; if higher current headroom is required, look for higher Isat parts even at the cost of larger size. Useful search phrases for sourcing include “800 nH 0805 automotive inductor” and “TDK ADL decoupling inductor performance” to locate parts with similar footprints and ratings. Evaluate comparative datasheet curves for L vs I and impedance vs frequency to ensure the chosen variant meets the system’s dynamic and steady‑state needs.
Procurement realities: lead time, packaging, and lifecycle
Automotive programs must plan for lead‑time variability and minimum order quantities; confirm reel packaging, quantity per reel and the supplier’s lifecycle notices. Distributors show lead‑time estimates, but always validate with the manufacturer for production ramps. Request AEC‑Q200 certification copies and lot traceability for first articles, and consider stocking a safety buffer for critical camera or ADAS runs where second‑source qualification is slow. Work with suppliers to lock packaging and change control terms in long‑term agreements to avoid late lifecycle surprises.
Final acceptance checklist before production sign-off
Before sign‑off, verify: measured L at the datasheet reference frequency under representative bias; DCR within max limits at operating temperature; Isat/saturation behavior for expected transient profiles; thermal cycling and solderability tests; footprint fit and mechanical robustness; and EMC/thermal system testing on the target assembly. Include sample‑level acceptance across at least three production lots to ensure consistency and avoid field issues after assembly.
Summary
ADL2012-R80M-T01 is a compact 800 nH TDK inductor optimized for automotive decoupling and PoC use — its 800 nH ±20% spec at 1 MHz, ~1.8 A rated behavior for L change, and ~120 mΩ DCR define where it excels and its trade‑offs. Engineers should validate L vs I, DCR, thermal rise and impedance on the target PCB, use the recommended measurement setups, and follow the procurement and acceptance checklist before production. For camera and PoC applications, place the choke close to the power entry, pair with appropriate bulk and high‑frequency capacitors, and confirm that saturation behavior under expected pulses maintains system stability.
Key summary
- The ADL2012-R80M-T01 provides 800 nH ±20% at 1 MHz in an 0805 footprint, suitable for mid‑MHz decoupling in space‑constrained automotive camera and PoC designs.
- Rated current (~1.8 A L‑change) and ~120 mΩ DCR set practical limits for transient handling and thermal loss; validate via L vs I and I²R calculations on the target PCB.
- Measurement and validation require four‑terminal fixtures, bias currents, and on‑board testing to match datasheet conditions and ensure reliable in‑vehicle operation.
FAQ
What are the ADL2012-R80M-T01 specs for inductance and tolerance?
The core inductance spec is 800 nH with a ±20% tolerance measured at 1 MHz as the manufacturer reference. This frequency reference matters because inductance and impedance vary with frequency due to core permeability and parasitic capacitance; always compare your lab impedance curve to the datasheet reference to confirm the part meets the expected band performance on the target board.
How does ADL2012-R80M-T01 behave under DC bias and what test should you run?
Under DC bias the effective inductance decreases; the datasheet defines a rated current where L is reduced by a specified percentage (for example ~30%). To validate behavior, run L vs I sweeps with a bias current source and an impedance analyzer or LCR meter at the datasheet frequency, and compare against supplier curves. Also perform pulsed‑current tests to observe transient saturation and measure thermal rise during worst‑case duty cycles.
What layout and thermal practices ensure reliable performance for ADL2012-R80M-T01?
Keep the inductor close to the power entry or converter pin it serves, minimize loop area with adjacent decoupling capacitors, and use short, wide copper traces to lower conduction loss. Ensure adequate copper for heat spreading and avoid placing the inductor under obstructive components. Follow reflow recommendations and confirm solder fillet integrity on the 0805 packaging for long‑term reliability in automotive environments.